Making a Wind Measurer for the Under Fives
This page gives some ideas for making and using a wind measurer. The activity is deliberately kept simple, and aims to introduce the children to the idea that they can also watch the weather.
A full introduction to the Windy Weather topic for younger weather watchers can be found on the Windy Weather page. This includes a full list of resources and some hints on necessary preparation. The other windy activities are linked on the right and at the bottom of this page.
The children would benefit from finding out what wind is and who measures it before starting this work. This can be found on the What is Wind? page. This work can be followed with wind songs, poetry, story and drama. This can be found on the Words and Actions page.
Resources (linked on the right)
- Wind recording sheet (see right)
- Making a paper windmill - list of URLs and hints on how to put together and activity. This is intended as a resource for student teachers. It does however have some useful URLs for everybody. This would be a good complimentary activity to making the wind measurer.
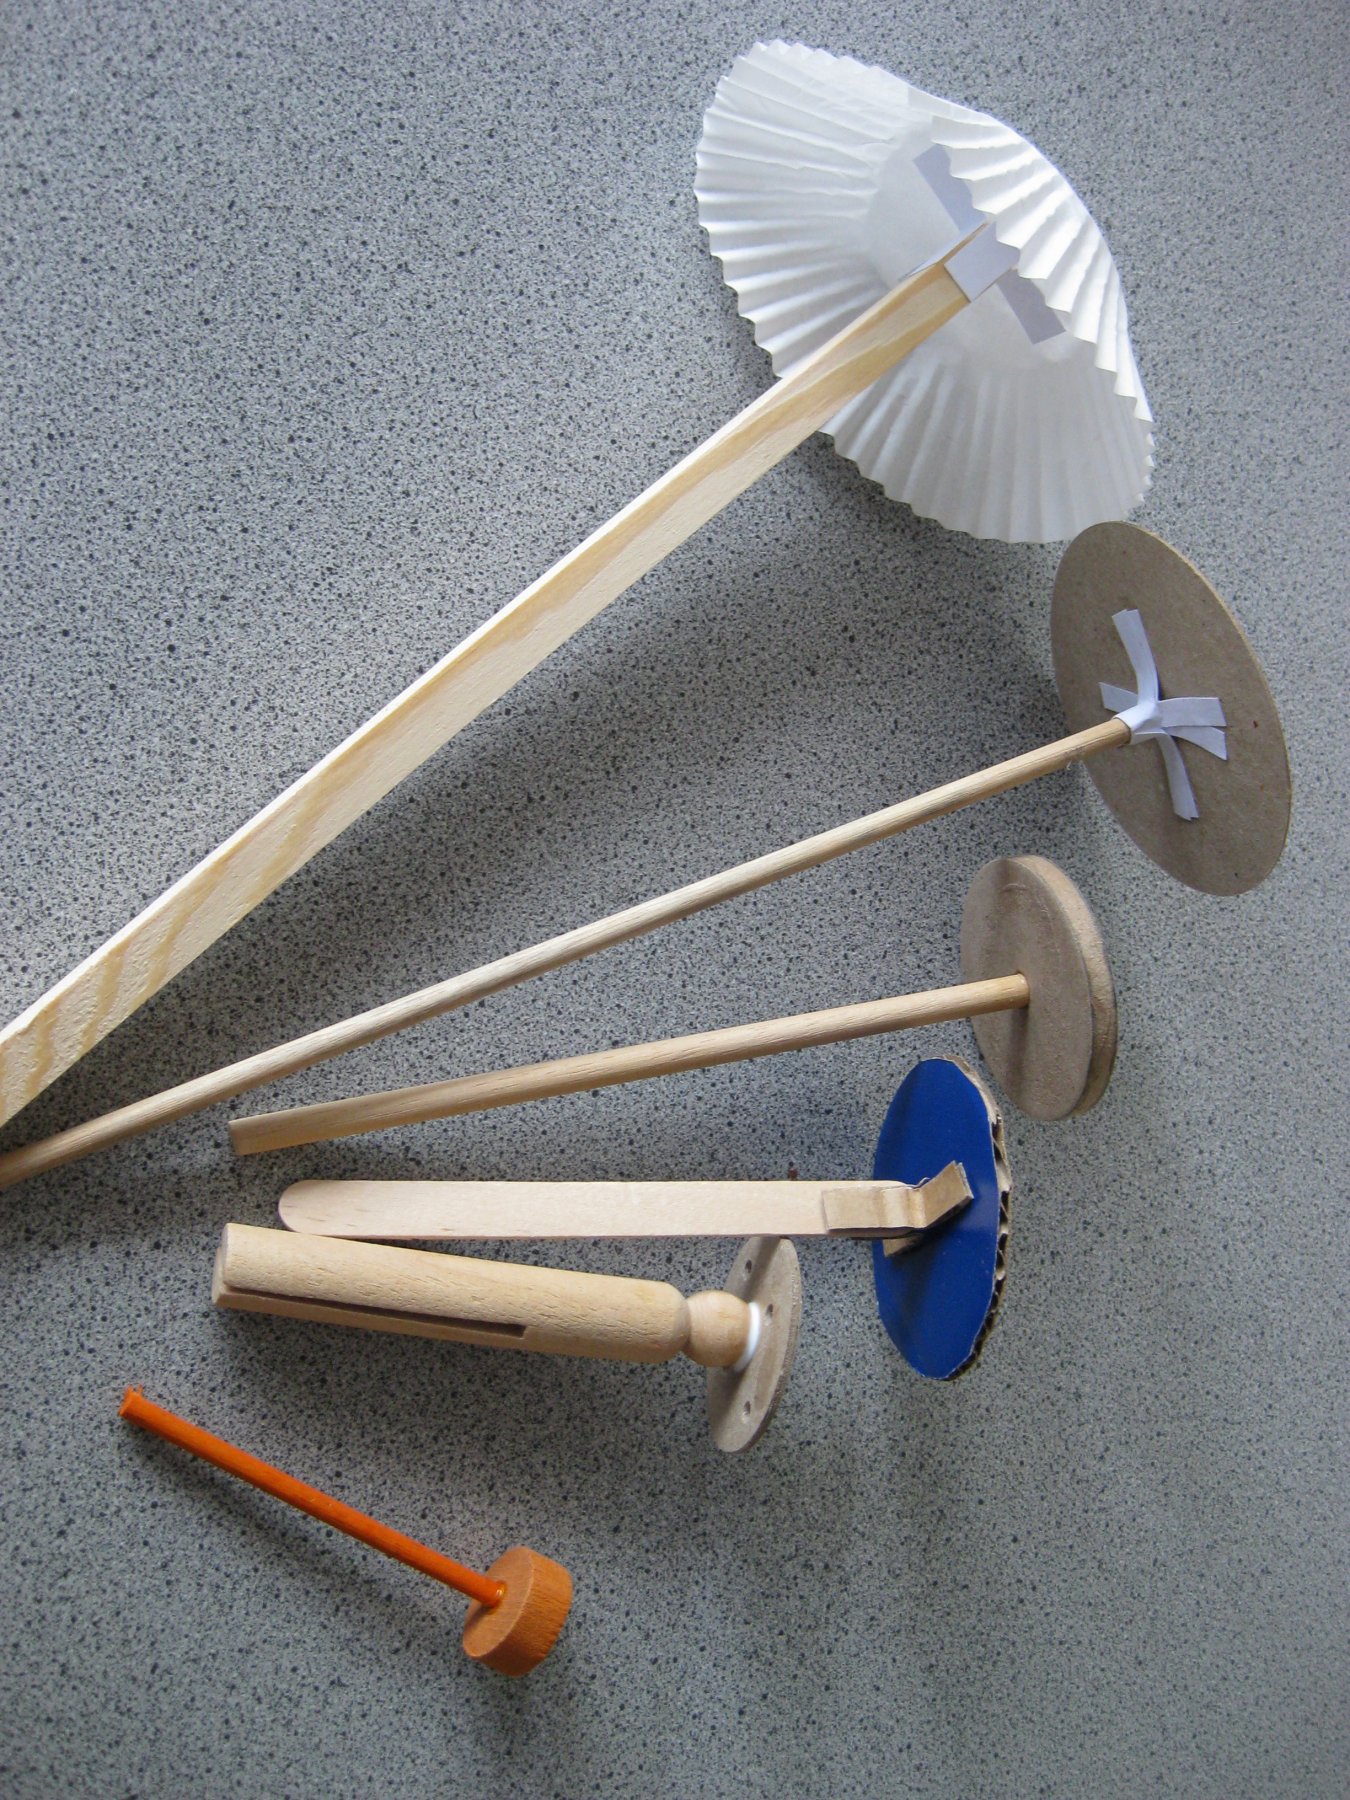
- TRE resource on joining the stick to the circle for the wind measurer.
- Making a Wind Measurer - guidance notes.
- Wind Measurer - Interactive Whiteboard drag and drop activity
- Website URLs
Resources you might like to acquire
- kite, umbrella, wind chime, weather vane, large feathers, hats, hand fans – all good for the display
- an electric fan for use under supervision when the weather does not oblige
- a basic anemometer – something which visually shows the wind speed. Some examples can be seen on the wind pages. A video clip of a good example for younger weather observers is on the More About Wind Measurements page
(http://www.weatherforschools.me.uk/html/morewind.html ). - Compass Rose, correctly orientated and painted on the playground.
Preparation
- Prepare the bases for the wind measurers.
- Decide on a theme for the wind measurers. Gather together suitable resources for decorating them.
- Download the IWB Wind Measurer activity and try it out to see how you are best to run it. If you right click and save it, then double click on it it should run in your default program. It could be loaded into an IWB page. Alternatively just run it from the link above. For this you will be relying on your internet connection working when you need it.
Making a wind measurer
There are three different levels to this activity. All provide informal measures of wind strength. If a more formal measurement is needed look on the Wind pages of this website. All can be decorated to fit in with a theme; seasonal etc..
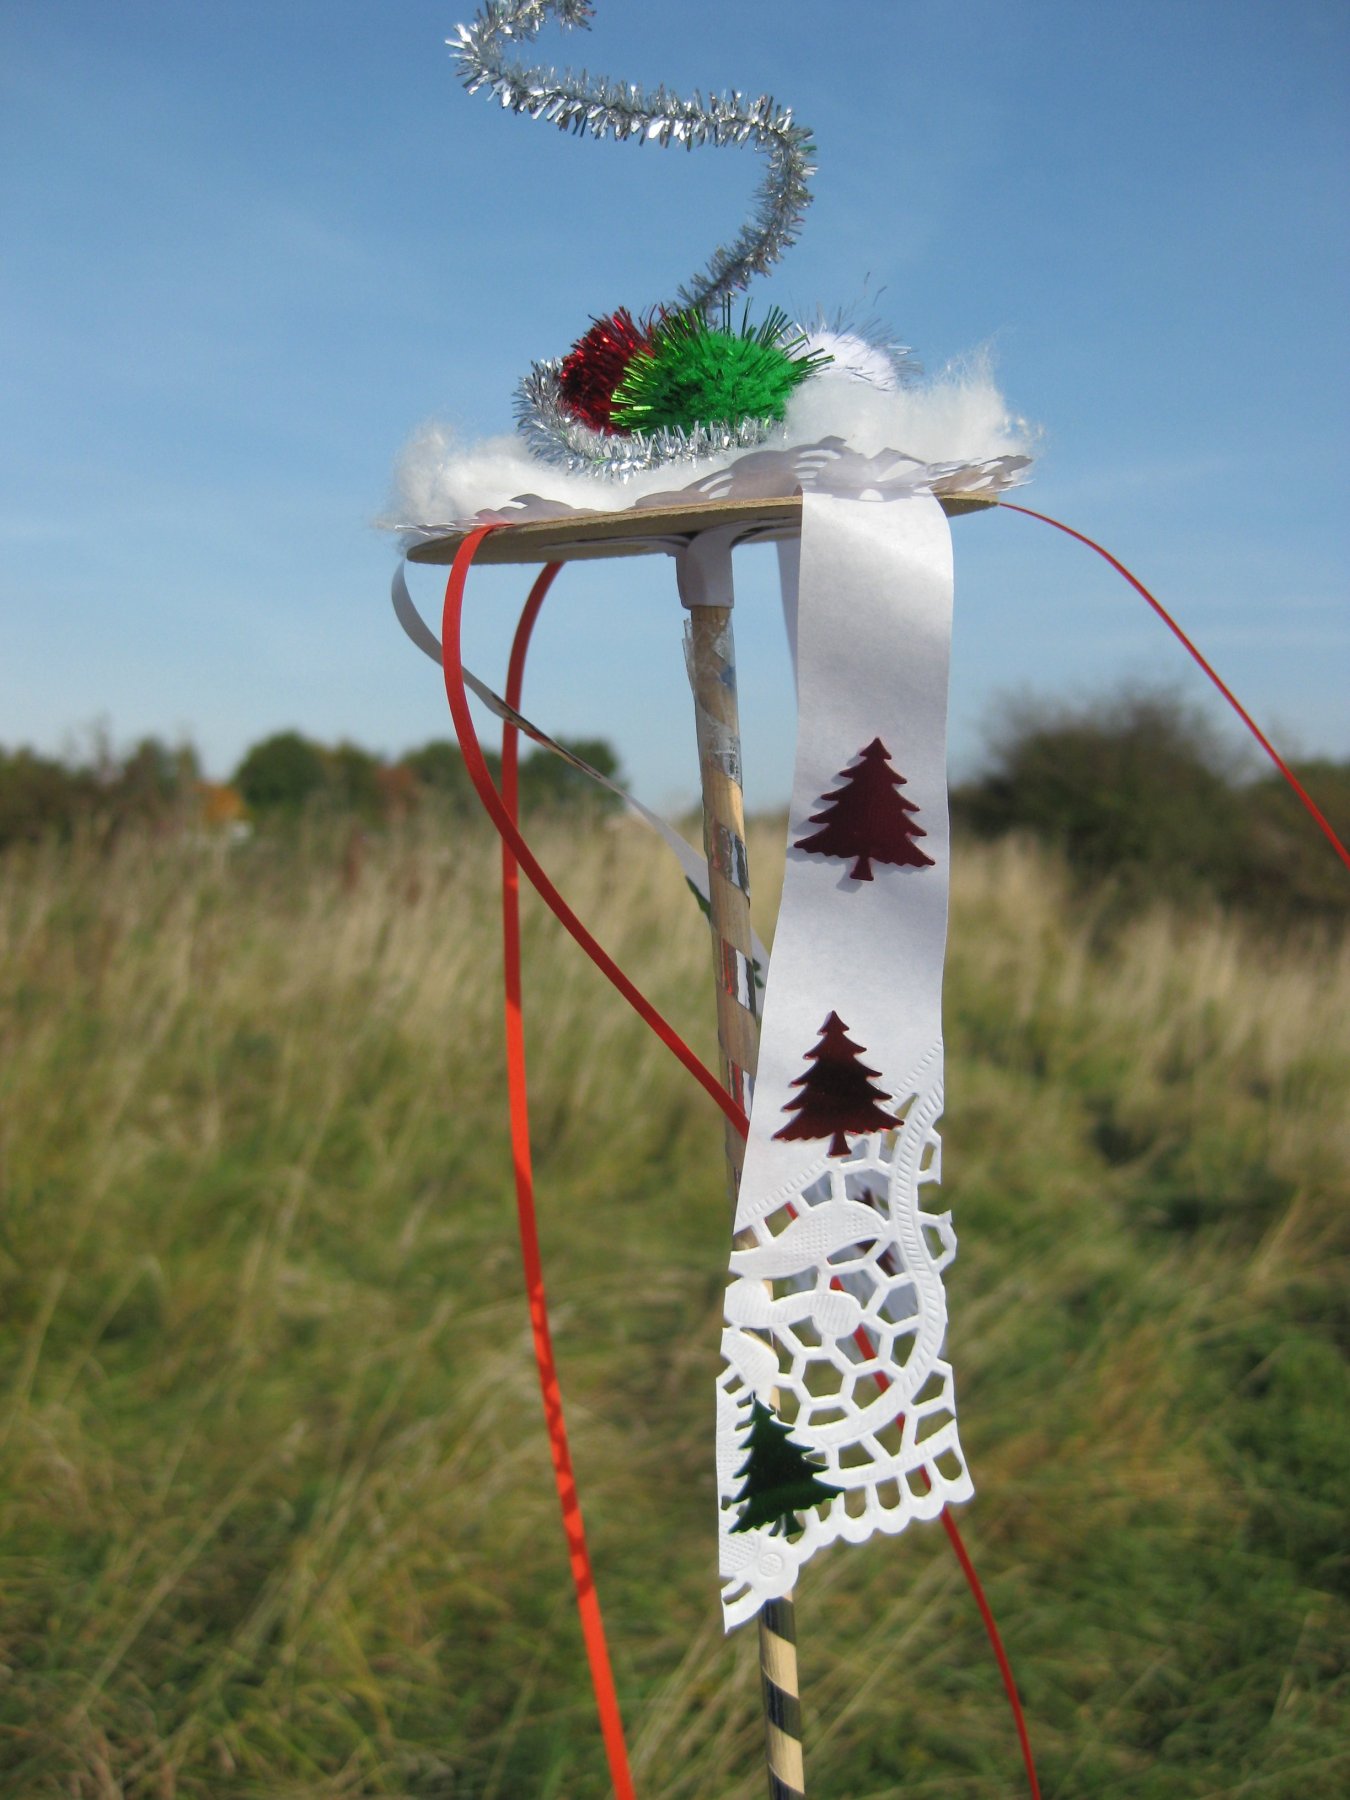
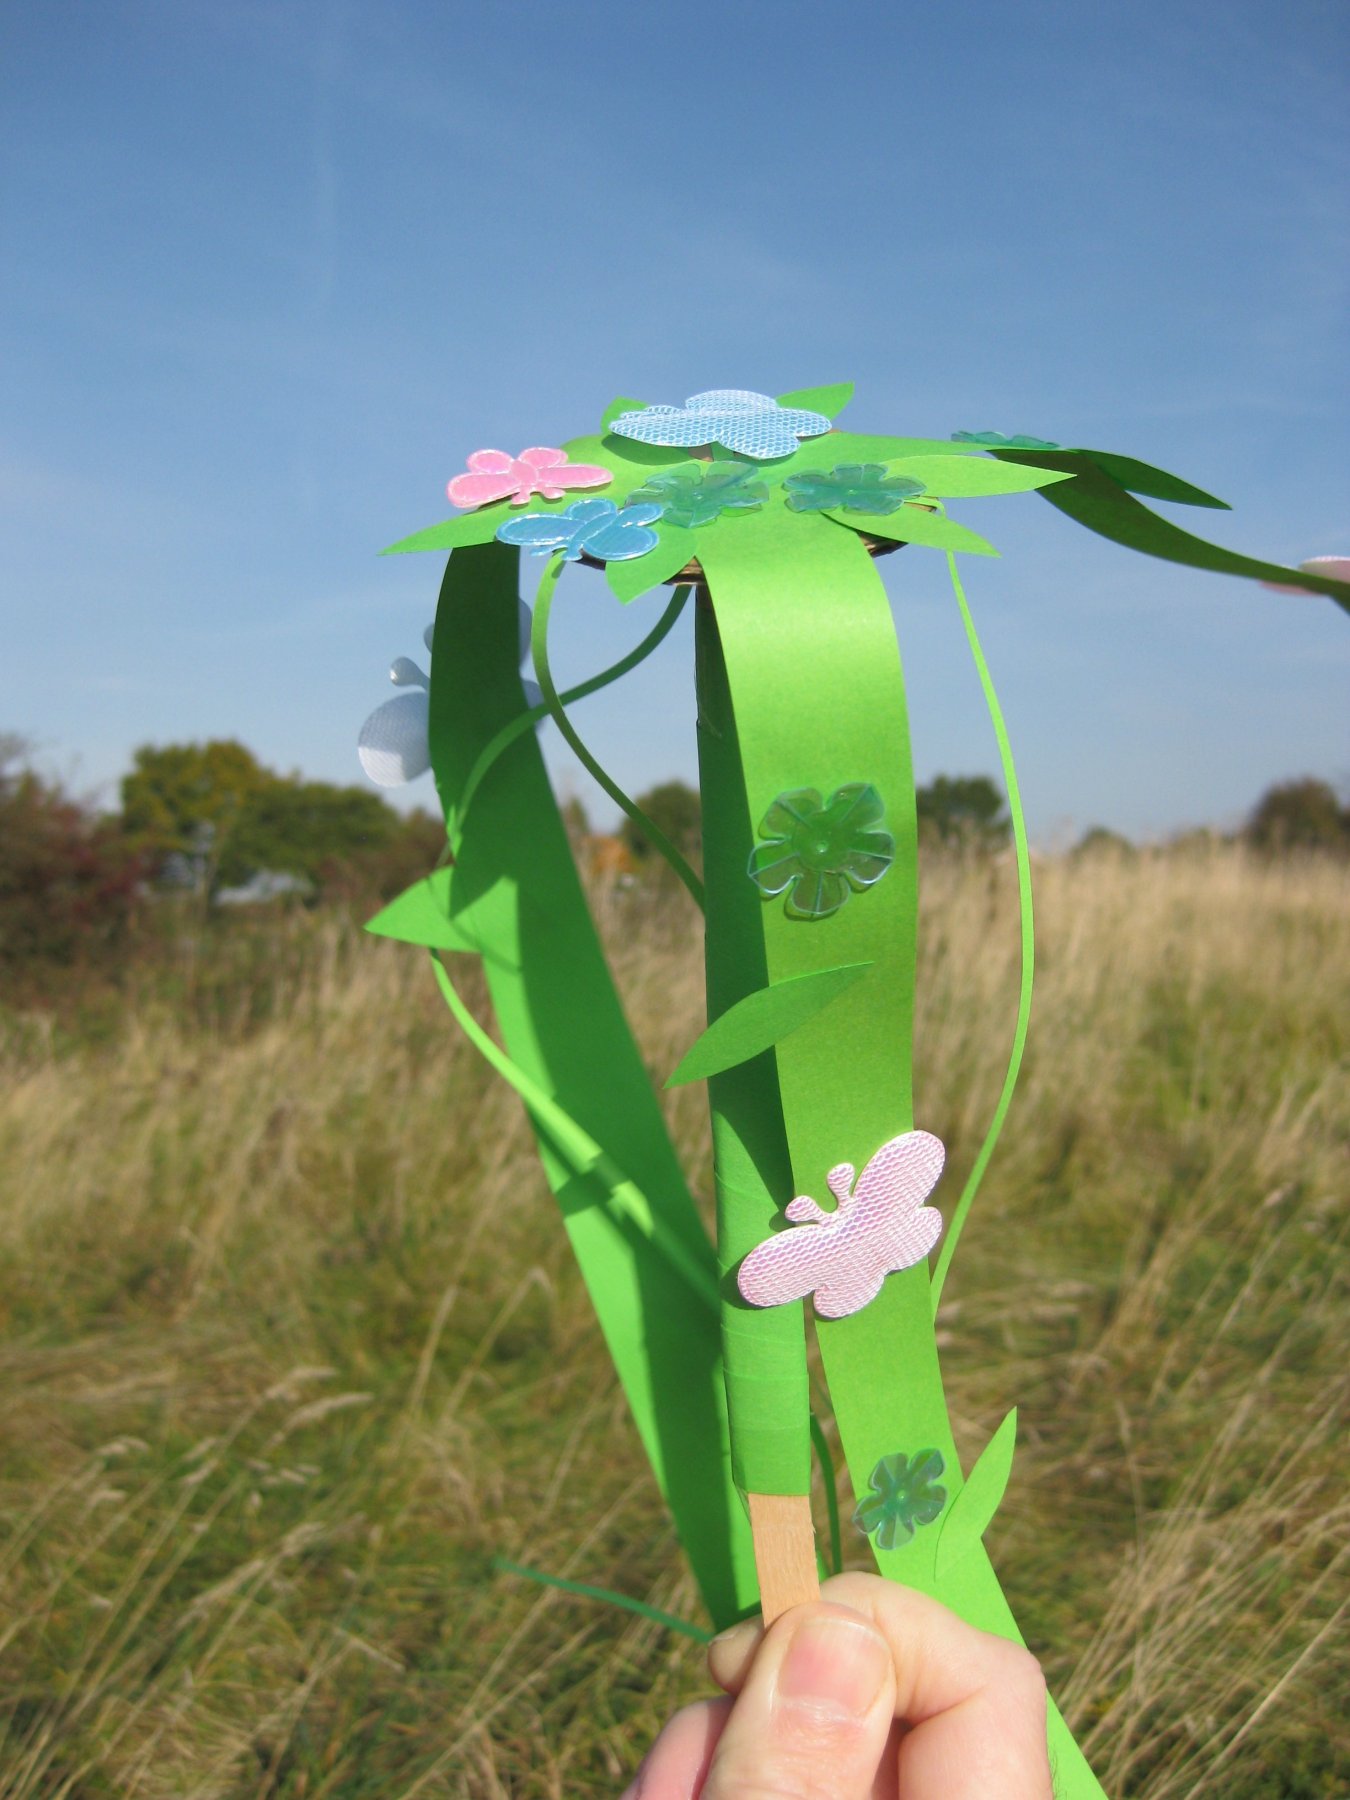
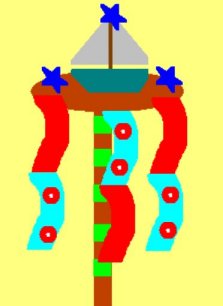
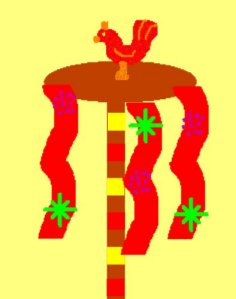
The basic wind measurer is intended for younger children, and simply gives an idea of how windy it is.
 |
 |
 |
 |
 |
 |
The next model gives an idea of how strong the wind is but also has the facility for estimating where the wind is coming from. To use this, the children will need access to a real compass, a painted Compass Rose on the playground or the compass points on a weather vane. This activity is suited to children of five years and above.
A basic anemometer, with cups that spin, is a more challenging task. This perhaps would be more suitable for six to seven year olds.
Basic wind strength measurer -
Materials – depending on the method you choose, you will need a selection from the following –
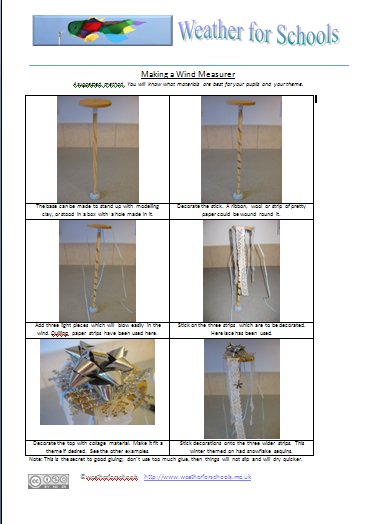
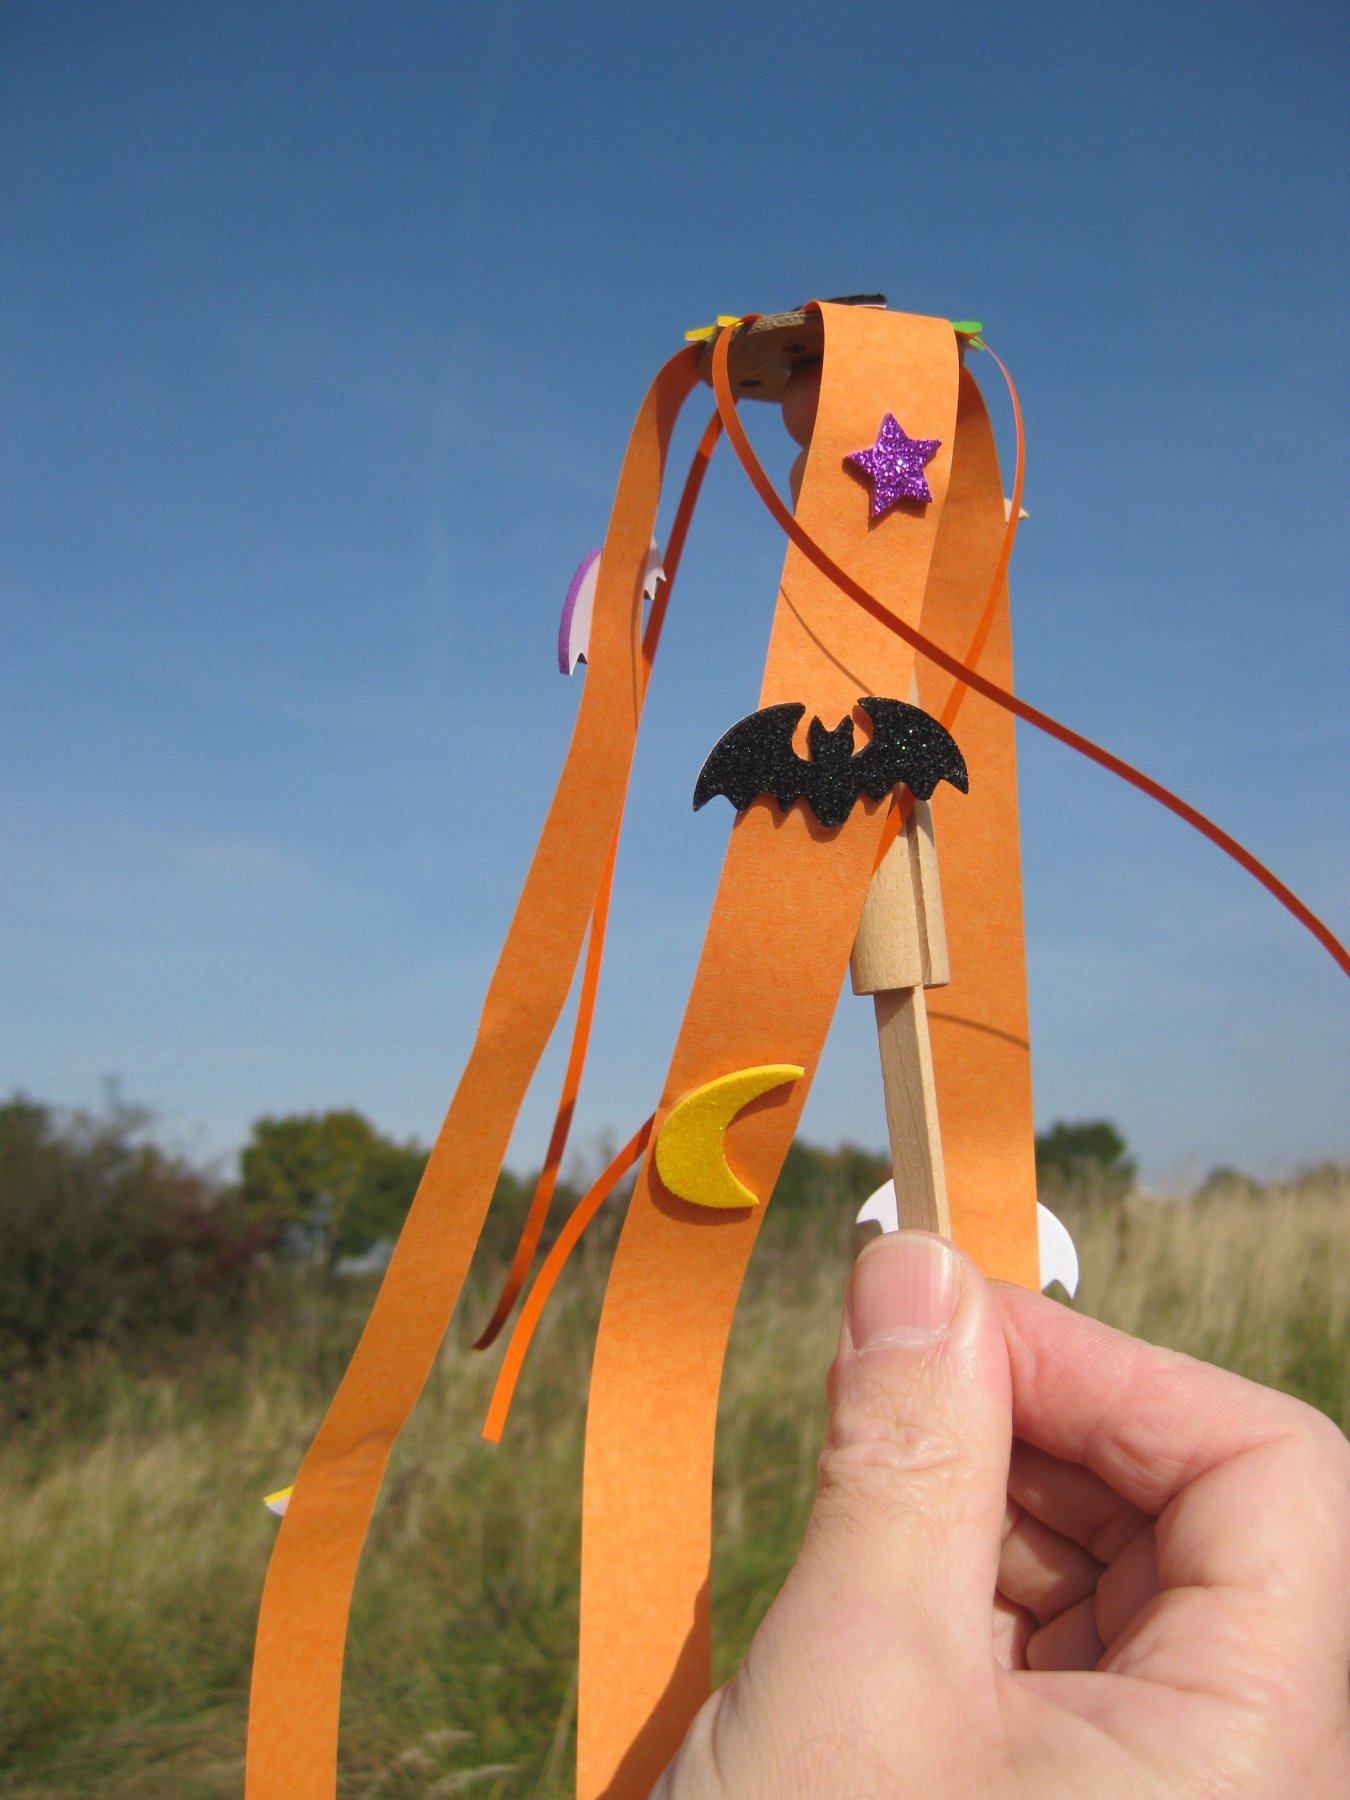
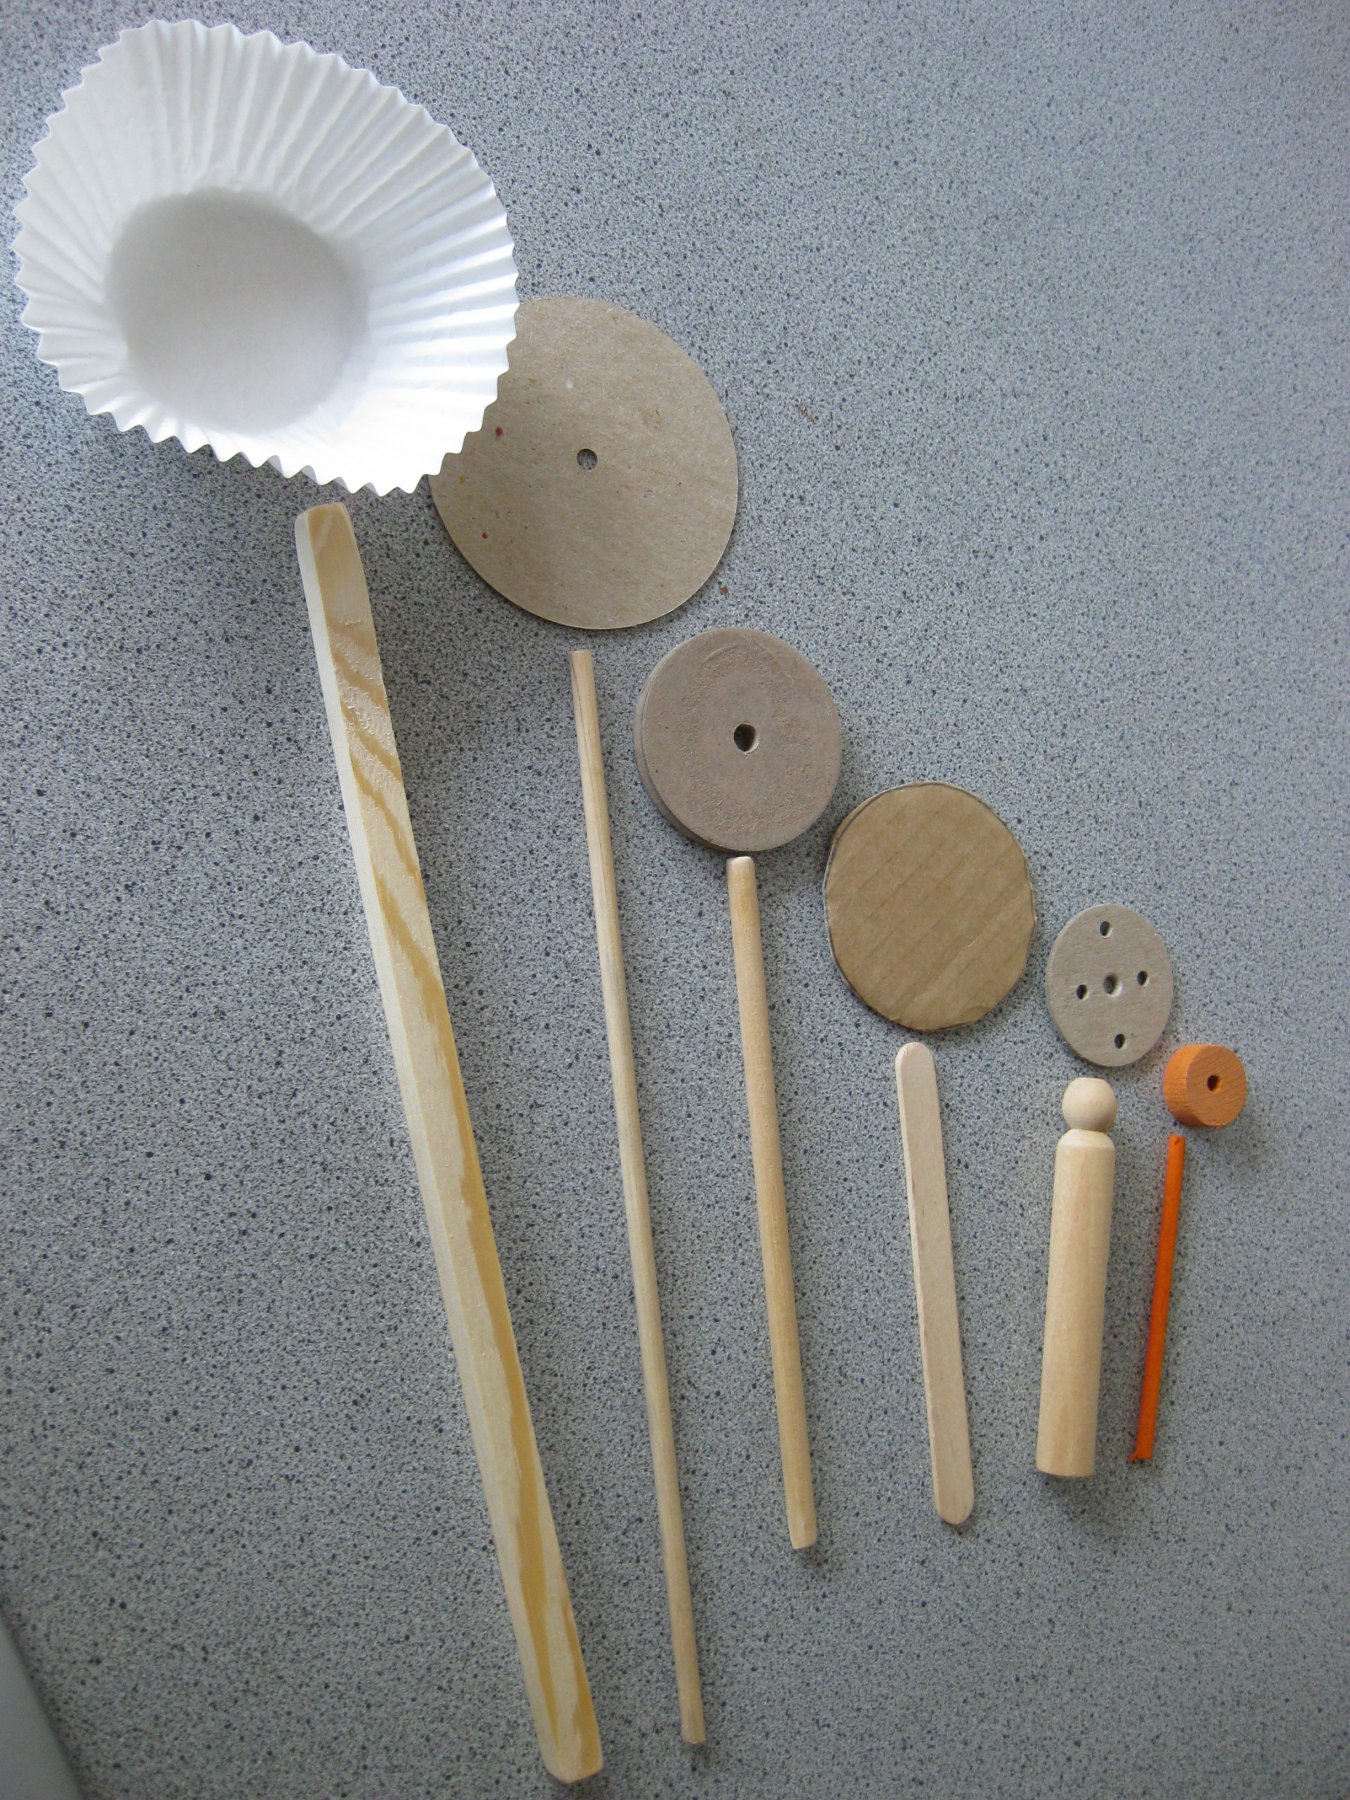
Bases - lolly sticks, coloured axles and wheels, dowel, card circles, muffin cases. These may be best ready stuck together for the children. This is speedily done by an adult with a glue gun. See the example materials in the photographs above. See some ideas of how to join them in the TRE resource.
Streamers - thin strips of paper, thin strips of material, strips of lace
Decorations - sequins, foam shapes, glitter, collage materials.
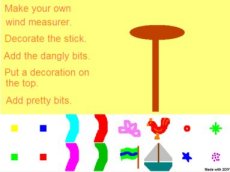
Introduction – show the children a finished wind measurer of the type they are going to make. To explain the different elements of the decorations use the IWB Wind Measurer activity (this was made using 2DIY from 2Simple). Load up the activity. Show how the first four squares are used to decorate the stick. Explain that this might be a ribbon wrapped round the stick. Next choose some dangly bits - these are hung onto the circle at the top. If you want them to be longer add a second strip under the first. Choose something to go on top. Lastly add some decorations. These can go anywhere including on the disc and on the dangly bits. Let the children have a go at dragging and dropping. (Use the right and left cursor keys to rotate a part, use the up and down cursor keys to make them bigger or smaller.) Coax them to give reasons for their choices. Look at the finished wind measurer. Some examples of the finished IWB Wind Measurer activity are included below.
 |
 |
 |
Discuss the theme, if you are going to use one. Explain to the children that they are going to choose six strips for the wind to blow. Three can be decorated; three will be left extra light so that the wind can blow them. Remind them of any techniques that you are using to ensure the correct use of the glue. Could the children sing a selected nursery rhyme whilst they wait for the glue to set a little? The North Wind Doth Blow would be a good one to choose.
Making – Let the children make a wind measure each. To see some pictures of a wind measurer being made you can look at Making a Wind Measurer. This might help give an idea of what the activity might look like. Have a place for them to be put to dry. Prepare cones of modeling clay with a printout of a child’s name next to each one, or the symbol they use for their coat pegs. They can use them to stand up their finished wind measurer so that they don’t stick to anything as the glue dries. They will also be able to tell which one is there’s. Perhaps the name can then be glued onto their stick by an adult.
See the example pictures of different variations on the design.
Using – When it is windy go outside with the wind measurer. You might like to explain that it is best to be away from buildings or trees; in a clear space. This will give an idea of the proper wind speed. Remind the children to be gentle with them, and hold them by the stick. Hold the wind measurers up high. Do the strips move? Are they being blown by the wind? Are they moving a little bit or a lot? Is it windy, quite windy or very windy? Try them out on days when the wind is different strength s. If a windy day does not occur when you need it, set a fan going at its different speeds and see how the pretty strips move differently. Store the wind measurers on a display, using the modeling clay cones to keep them upright. You might like to include some of the vocabulary from the wind vocabulary sheet.
The children can help an adult to fill in the recording sheet. Some children may soon pick up which word is which and be able to fill it in themselves.
Wind direction and strength measurer
This is fairly similar to the Basic wind strength Measurer except that it has a compa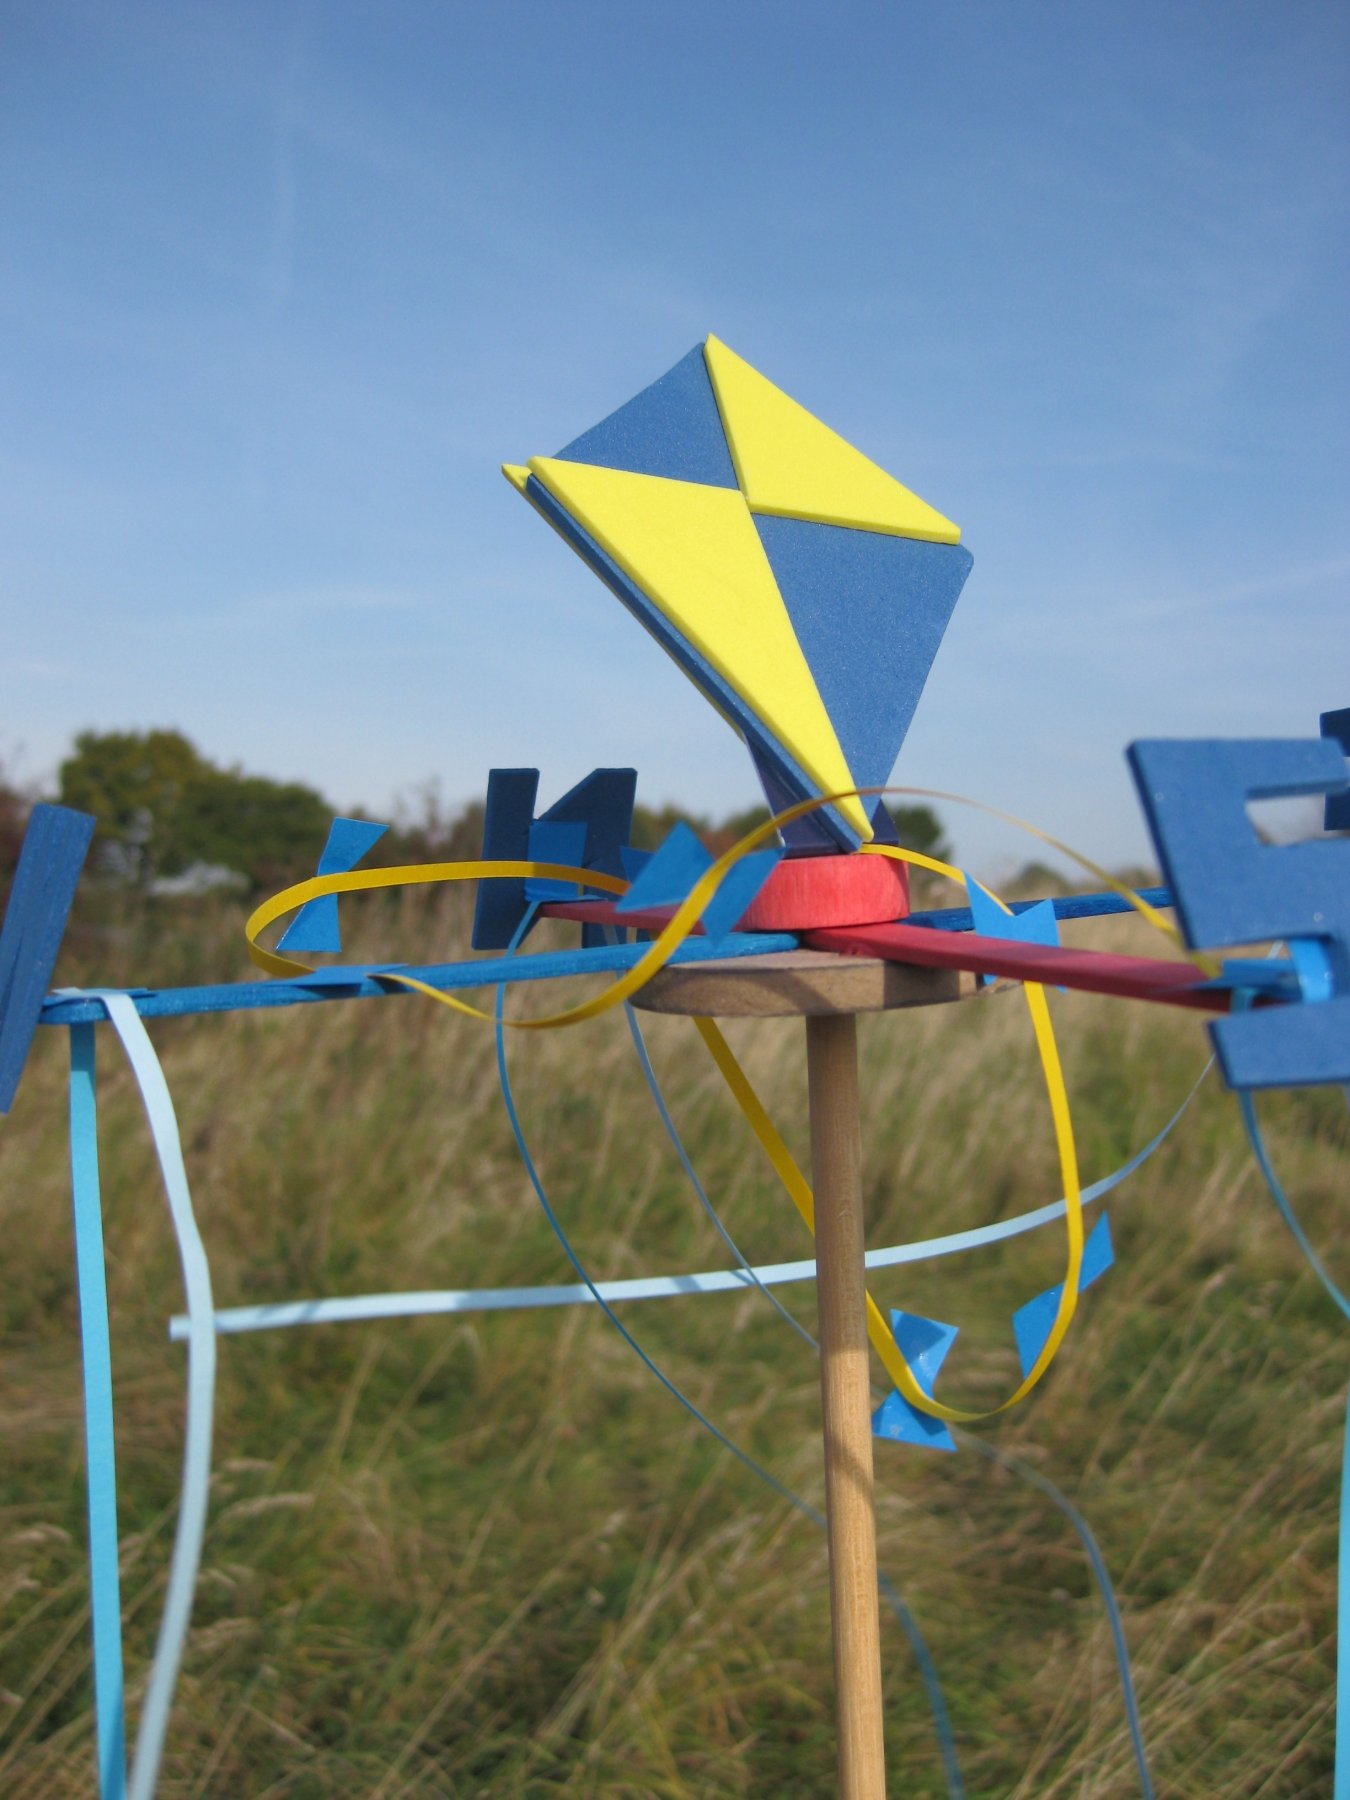 ss rose on the top. This means that a compass can be used to align it, then the user can look to see which way the strips are blowing. They can then record the direction that the wind is coming from. This is important, as different directions bring different winds. These can be warm or cold, wet or dry.
Materials – depending on the method you choose, you will need a selection of the following – lolly sticks, coloured axles and wheels, dowel, card circles, muffin cases, thin strips of paper, thin strips of material, sequins, foam letters, foam shapes, glitter, collage materials.
Introduction – show the children a finished wind measurer of the type they are going to make. Discuss the theme, if you are going to use one. Explain to the children that they are going to attach thin strips for the wind to blow. Revise the use of the four points of the compass and look at a picture of a weather vane. Show how the four letters are arranged. Explain that they can put a cut out in the shape of something to match their theme in the middle. This weather vane will not go round; it will just help see which way the strips are blowing. Discuss what join will be best for fixing the letters and outline shape onto the wind measurer.
Making – Let the children make a wind measure each. This is definitely best done with wooden sticks and axles. This makes it easy to stick the two lolly sticks at right angles. Make sure the children count to ten each time they have stuck a piece on and that they do not use too much glue. Have a place for them to be put to dry. Prepare cones of modeling clay which they can them to stand their sticks into these so that they don’t stick to anything as the glue dries. Remind the children to put their names or initials on the underside of their circle.
Using – When it is windy go outside with the wind measurer. Remind the children to be gentle with them, and hold them by the stick. Look at a compass, compass rose painted on the playground or a weather vane. Turn the wind measurer’s compass rose to match. Which direction do the strips blow in? Where is the wind coming from? That is the direction to record. Are the strips moving a little bit or a lot? Is it windy, quite windy or very windy? Try them out on days when the wind is different strengths. See the other notes on the Basic Wind measurer. Keep a record for a week of the wind strength and direction. You could use the Wind Recording Sheet. The children might like to do the weekend recording at home.
The Full List of Activities
What is wind?
Who Measures the Wind?
Making a wind measurer
Songs about the wind
Wind Poetry
Wind Story